

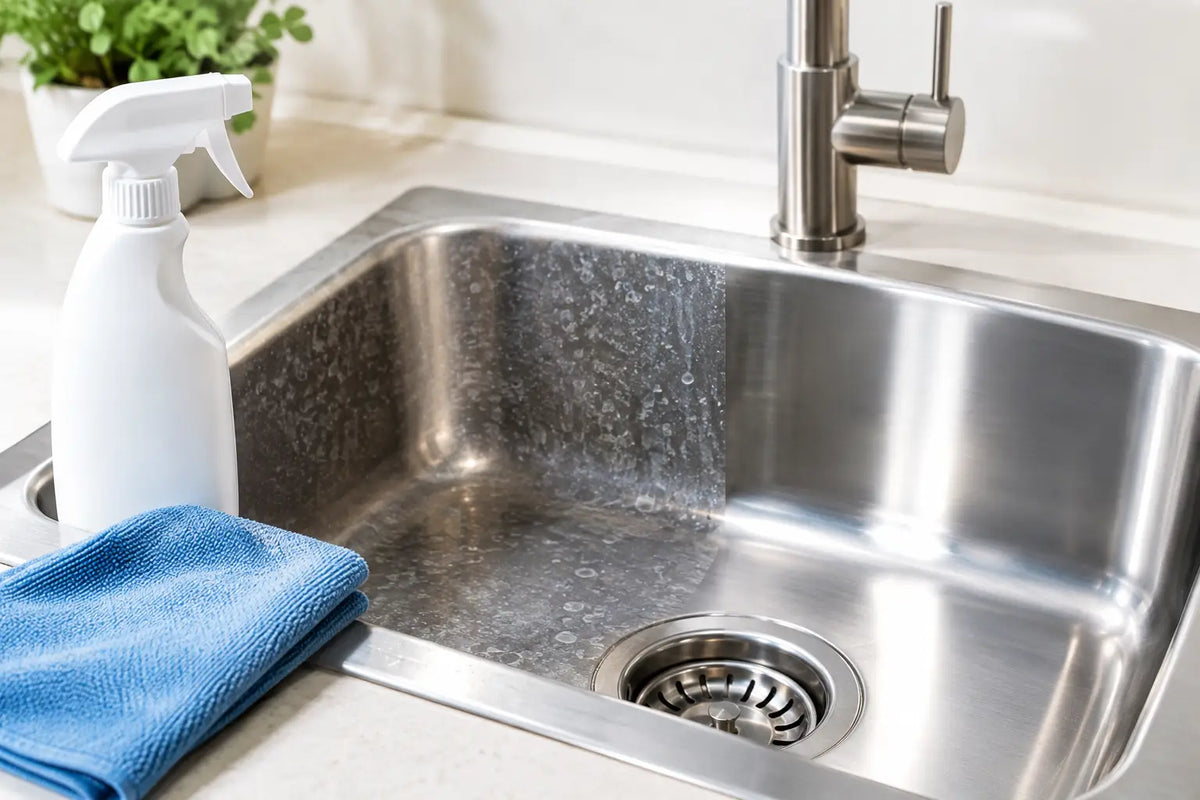
Water spots on a stainless refrigerator, sink, range hood, or dishwasher can make an otherwise clean room look neglected. The right stainless steel water spot remover does more than add temporary shine: it safely lifts mineral residue without leaving haze, scratches, or an oily film that attracts fingerprints again the next day.
The most effective approach starts with identifying what is actually on the surface. Many marks that look like permanent staining are simply dried hard-water minerals. Others are grease, cleaner residue, heat discoloration, or early corrosion. Treating every mark with the same harsh cleaner can damage the finish and create more maintenance work, not less.
What Water Spots Do to Stainless Steel
Water is rarely just water. In areas with hard water, it carries dissolved calcium, magnesium, silica, and other minerals. When droplets evaporate, those minerals stay behind. On brushed stainless steel, they often appear as white specks, dull rings, cloudy streaks, or a gray film that interrupts the metal's original sheen.
Stainless steel is durable, but it is not maintenance-free. Its corrosion resistance comes from a thin, self-protecting chromium oxide layer. Abrasive pads, chlorine bleach, and aggressive acidic products can compromise the appearance of that layer or leave the surface more vulnerable to discoloration. A remover should be strong enough to dissolve mineral buildup while remaining appropriate for the appliance or fixture finish.
That distinction matters. A product designed to cut through baked-on grease may not be the best choice for hard-water spotting. Likewise, an oily stainless polish can make a surface look better briefly without removing the mineral layer underneath. The result is often streaking as soon as the surface is touched or exposed to moisture again.
How to Choose a Stainless Steel Water Spot Remover
Look for a cleaner that is formulated to address mineral deposits and dries cleanly. The goal is to remove what is on the steel, not mask it with waxes, heavy fragrances, or residue. A non-toxic, surface-appropriate formula is especially useful in kitchens, bathrooms, and high-touch areas where routine use matters.
The finish of the stainless steel also affects your choice. Brushed stainless has a visible grain, while polished stainless is smoother and more reflective. Both can show water spotting, but brushed finishes are more likely to reveal scratches from abrasive powders, scouring pads, or stiff brushes. If you are unsure of the finish, test any remover in a small, less-visible area first.
Avoid products that contain chlorides or recommend steel wool for routine cleaning. Chlorine bleach, harsh oven cleaners, and abrasive tools may seem effective in the moment, yet they can cause pitting, scratching, or a permanently uneven finish. A clean microfiber towel and a purpose-made remover are usually the safer, more controlled combination.
Water Spots, Smudges, and Rust Are Different Problems
A true water spot usually feels smooth or slightly raised and becomes less visible when the surface is wet. A greasy fingerprint smudge tends to smear under a dry cloth. Rust-colored dots, pitting, or rough patches may indicate contamination or corrosion rather than ordinary mineral residue.
If a mark does not respond to a gentle mineral-removal treatment, do not keep increasing pressure or reach for a more abrasive product. That is the point to reassess the stain. Professional restoration may be appropriate for deep scratches, corrosion, or damage to specialty finishes such as black stainless steel.
How to Remove Water Spots Without Scratching
Start with a cool surface. Heat can cause cleaners to evaporate too quickly, making them harder to wipe evenly and more likely to streak. Remove loose dust or food residue first with a damp microfiber cloth so you are not rubbing grit across the metal.
Apply the stainless steel water spot remover according to its directions, using only enough product to wet the affected area. Let it work for the recommended contact time. Mineral deposits need time to release, but leaving any cleaner on longer than directed does not necessarily improve results.
Wipe with a clean microfiber cloth in the direction of the stainless grain. On most appliances, the grain runs horizontally, though it can vary. Following it helps produce an even appearance and reduces the chance of visible wipe marks. For heavier buildup around sink rims, faucet bases, or refrigerator water dispensers, repeat a gentle application rather than scrubbing harder.
Finish by buffing the surface dry with a second, dry microfiber cloth. This final pass is where many streak-free results are won or lost. A cloth already saturated with cleaner or minerals can simply redistribute residue, so change cloths when needed.
For a small fresh spot, prompt cleaning may be all that is necessary. For a cloudy film that has built up over weeks or months, expect to work in sections and repeat the process. Patience is safer than abrasion.
Why Homemade Fixes Have Limits
Vinegar is a common household suggestion because mild acids can loosen mineral deposits. For occasional use on some stainless surfaces, a diluted vinegar solution may help. But it is not a universal answer. The odor, inconsistent concentration, and potential for streaking or surface dullness with repeated use make it less dependable than a cleaner developed for the task.
Baking soda pastes, powdered cleansers, and scrub pads present another trade-off. They can create quick visual improvement on stubborn marks, but their abrasive action may alter a brushed finish. Once the grain pattern is scratched, it cannot be restored with ordinary cleaning.
Dish soap is excellent for oils and everyday food residue, yet it is not always effective against mineral deposits. It can also leave a film if not rinsed and dried thoroughly. When hard-water spotting is the problem, use a product intended to dissolve hard-water residue, then rely on better drying habits to keep it from returning.
Prevent New Spots With a Better Maintenance System
Removing existing deposits is only half the job. Water spots return when droplets are allowed to dry repeatedly on the surface, especially near kitchen sinks, ice dispensers, bathroom fixtures, and outdoor stainless components.
A simple routine keeps the work minimal: wipe splashes before they dry, use a clean microfiber towel after cleaning, and avoid spraying cleaners directly onto appliance panels when overspray can settle in seams or controls. Spray the cloth instead when practical. This gives you better control and reduces excess product.
For high-exposure areas, consider surface-care products that leave an ultra-thin protective barrier designed to make future residue easier to release. Protection is not a substitute for wiping up spills, and no coating makes stainless steel immune to minerals. Its value is in reducing how strongly contaminants cling, so routine cleaning requires less time, fewer harsh chemicals, and less repeated rubbing.
Keep towels clean as well. Fabric softener, old polish, and trapped grit can cause streaks or fine scratches. Reserve a few microfiber cloths for stainless steel and wash them without softener. It is a small change that makes a noticeable difference on reflective appliance surfaces.
When a Spot Remover Is Not Enough
If the surface has rainbow heat marks, deep scratches, rough pitting, flaking, or rust-like staining that returns quickly, the issue may extend beyond water spotting. These conditions can require a finish-specific restoration process. Trying to force a water spot remover to solve corrosion or physical damage risks making the finish less uniform.
Also check the source of the water. A leaking faucet, poorly aimed sink sprayer, hard-water ice dispenser, or humid bathroom can create a constant cycle of deposits. Correcting that source can be more valuable than changing cleaners repeatedly.
Clean stainless steel should look like stainless steel, not like it is covered in a heavy coating of polish. Choose a remover that targets the mineral film, use gentle tools, and dry the surface completely. That disciplined approach preserves the finish, restores a clear appearance, and turns a frustrating chore into a quick part of regular home care.

Leave a comment
This site is protected by hCaptcha and the hCaptcha Privacy Policy and Terms of Service apply.