

TL;DR: A proper glass coating can transform your bathroom mirror from foggy and smudged to crystal clear with minimal effort. This guide walks readers through a simple, professional-grade process to clean, prep, and protect mirrors for long-lasting shine and clarity.
- Learn how to thoroughly clean mirrors by removing grime like toothpaste, hairspray, and hard water spots
- Discover why microfiber cloths, coffee filters, or newspapers are ideal for streak-free, lint-free results
- Follow a step-by-step method to prep and dry the surface for optimal glass coating adhesion
- Apply glass coating evenly to reduce fogging, repel water, and prevent future smudges
- Finish with proper buffing techniques to achieve a polished, streak-free, professional shine
Your bathroom mirror shoulders a lot of burden in your bathroom. From daily fogging to toothpaste spatter, there are countless ways a bathroom mirror can become dingy just from normal everyday use.
Thankfully, clean mirrors are anything but a pipe dream. You may be surprised to learn it is relatively straightforward to clean your bathroom mirror like a professional cleaner.
You may also be surprised to learn that using glass coating is a key part of the process.
In this guide, we will outline the step-by-step insights required to apply glass coating, plus, ideal products to keep your bathroom mirror looking great. Follow these tips to help enhance clarity, reduce fogging, and prevent smudges on your bathroom mirror.
A Step-by-Step Guide to Applying Glass Coating
Step 1: Spray to Remove Residue
Before we apply a glass coating to help preserve its shine, we first need to make sure the surface is thoroughly clean. Chances are that your bathroom mirror is harboring some nasty bits of grime. This could include:
- Toothpaste spatter
- Hairspray
- Hard water deposits
- Fingerprints
- Dust
- And more
Unlike other surfaces in your home, though, a simple wipedown won’t cut it here. Instead, consider using a glass cleaner specifically designed for mirrors. Products such as these are water repellent for mirrors and are designed to cut through grime and promote a dazzling shine.
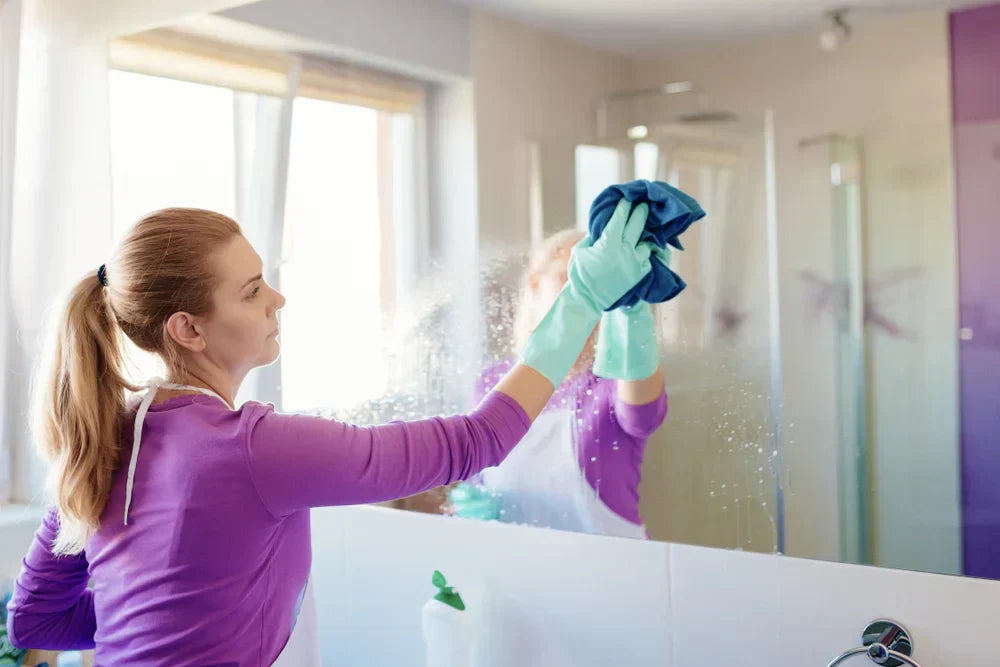
Step 2: Gently Wipe Away Residue
Following a simple spritz of your glass cleaner, let the solution penetrate your unwanted grime before wiping away to reveal a cleaner mirror. However, don’t fall victim to using a paper towel here. This will simply leave behind a new layer of dust that will become trapped by your glass coating later on and can even leave micro-scratches on the surface of your mirror.
Instead, consider using a low-lint material to wipe down your glass cleaner. A microfiber towel is a common choice here. However, another popular hack used by professional cleaners is to use coffee filters or newspapers, as these provide streak-free wiping power without the nasty lint leave-behinds.
Step 3: Dry Your Mirror
Now, it’s time to ensure your mirror is ready for your glass coating product. Taking the time to dry it will ensure the glass coating has an imperfection-free space to work with.
Using a tight-weave microfiber cloth, wipe your mirror’s entire surface. Here, we recommend using a few patterns to ensure you’ve covered every inch of its surface:
- Top-to-bottom
- Side-to-side
- Concentric circles
Pay extra attention to the edges and corners of your mirror (especially if it is framed), as residue may become trapped here with neglect. But once the surface is properly dry, it’s time to move onto our last few steps.
Step 4: Apply Glass Coating
With a clean and dry mirror, it is time to apply a glass coating product, which is water repellent for mirrors. We find that using a coating product designed for mirrors is the best way to keep mirrors clean, fog-free, and lustrous.
For this step, be sure to apply the glass coating evenly, per the directions found on your product. Using a small cloth, use smooth motions a few feet at a time as you wipe the coating across your mirror’s entire surface. Consider using both horizontal and vertical swipes to ensure your application is both comprehensive and evenly distributed.
Step 5: Buff and Polish
This is a commonly overlooked step, but it might just be the most important one for those looking for the best way to keep mirrors clean. Once your glass coating has had time to bond with the surface (this only takes a few minutes), use a new, dry microfiber cloth to buff and polish the mirror. You’ll know it’s time to buff when the coating takes on a slight haze.
If you find your buffing cloth cannot buff the entire mirror to a streak-free shine, consider using a second clean cloth to finish the buffing process. Once haze-free, your mirror has been coated properly!
Discover a Professional Grade Shine
If you yearn for dazzling and streak-free cleaning products for your bathroom mirrors, consider high quality cleaning products from DFI. Our products are formulated for long term use on your glass surfaces without the harsh chemicals your family should avoid.
Professional cleaners trust our collection, from mirror glass coating sprays to shower glass cleaners and beyond, to achieve easy, enduring gorgeousness across every surface in the bathroom. When you clean glass and offer a coating application using DFI products, you can achieve the same results.
Leave a comment
This site is protected by hCaptcha and the hCaptcha Privacy Policy and Terms of Service apply.